


In this lesson, we’ll start by getting comfortable with the trumpet and its three valves, talking about how each valve helps change the notes we play. After making sure the student can hold the trumpet and sit or stand with good posture, we’ll review steady breathing and buzzing, then move on to playing our first five notes: C, D, E, F,
and G. We’ll talk through each fingering—C uses no valves at all, D uses valves 1 and 3, E uses valves 1 and 2, F uses just valve 1, and G is open again with no valves. We’ll practice moving between these notes slowly, focusing on keeping the air steady and fingers relaxed as they press the valves. To make it fun, we’ll try a simple pattern using these notes, like echoing short melodies or rhythm games. We’ll finish with a quick recap, a small practice challenge—such as playing the five-note pattern once a day— and lots of encouragement to keep exploring the trumpet. As the student gets more comfortable with the first five notes, we’ll spend a little
time talking about how to move smoothly between fingerings without lifting the fingers too high or pressing too hard. We’ll introduce the idea of tonguing by practicing soft “too” or “tah” sounds to start each note cleanly, keeping it light and relaxed. To build confidence, the student will try playing a short, familiar tune—like a simple five-note version of “Hot Cross Buns” or another easy melody—using the new notes and fingerings. We’ll also check in on how their embouchure feels, making sure their lips stay comfortable and not too tight. At the end, we’ll celebrate improvements, talk about any spots that felt tricky, and set a fun goal for the next lesson, like playing the five- note melody a little smoother or a little louder with good tone.

Today’s lesson is all about getting started on the clarinet. This is the student’s very first real lesson, so we’ll focus on learning how to carefully put the clarinet together, how to hold it
the right way, and how to make our very first sound. The goal is for the student to feel comfortable with the instrument and be excited to play. We’ll begin by looking at all the parts of the clarinet and learning their names — like the bell, barrel, and mouthpiece. I’ll show the student how to put the clarinet together one piece at a
time, slowly and carefully, and we’ll talk about how to treat the instrument with care. Then we’ll take just the mouthpiece and barrel and try to make a sound — it might squeak at first, and that’s
totally okay! I’ll show them how to shape their mouth (we call that the embouchure) and how to blow steady air through the clarinet to make a nice sound. After a few tries, most students can get
a fun "duck" sound, and we’ll cheer when it happens.
Next, we’ll hold the whole clarinet and learn how to sit or stand with good posture. We’ll try playing just one note — open G — which is the easiest note for beginners. We’ll talk about
using our tongue gently to start the note and listen for a clear sound. I’ll play first, then the student will try. We'll take it slow, with lots of chances to try again. At the end of the lesson, I’ll ask the student what they learned and what they want to get
better at. This helps them feel proud of their progress. I’ll watch carefully during the lesson to see how they’re doing and give tips as needed. To help all students feel successful, I’ll give extra
help with tricky parts, like reed placement or finger position, and we’ll go at the student’s pace. We’ll use just a few things today: the clarinet, a reed, cork grease, and maybe a mirror so
they can see their mouth shape. I might also send home a short video or a picture guide to help them remember the steps. This first lesson should be fun, gentle, and encouraging — the start of
an exciting music journey!
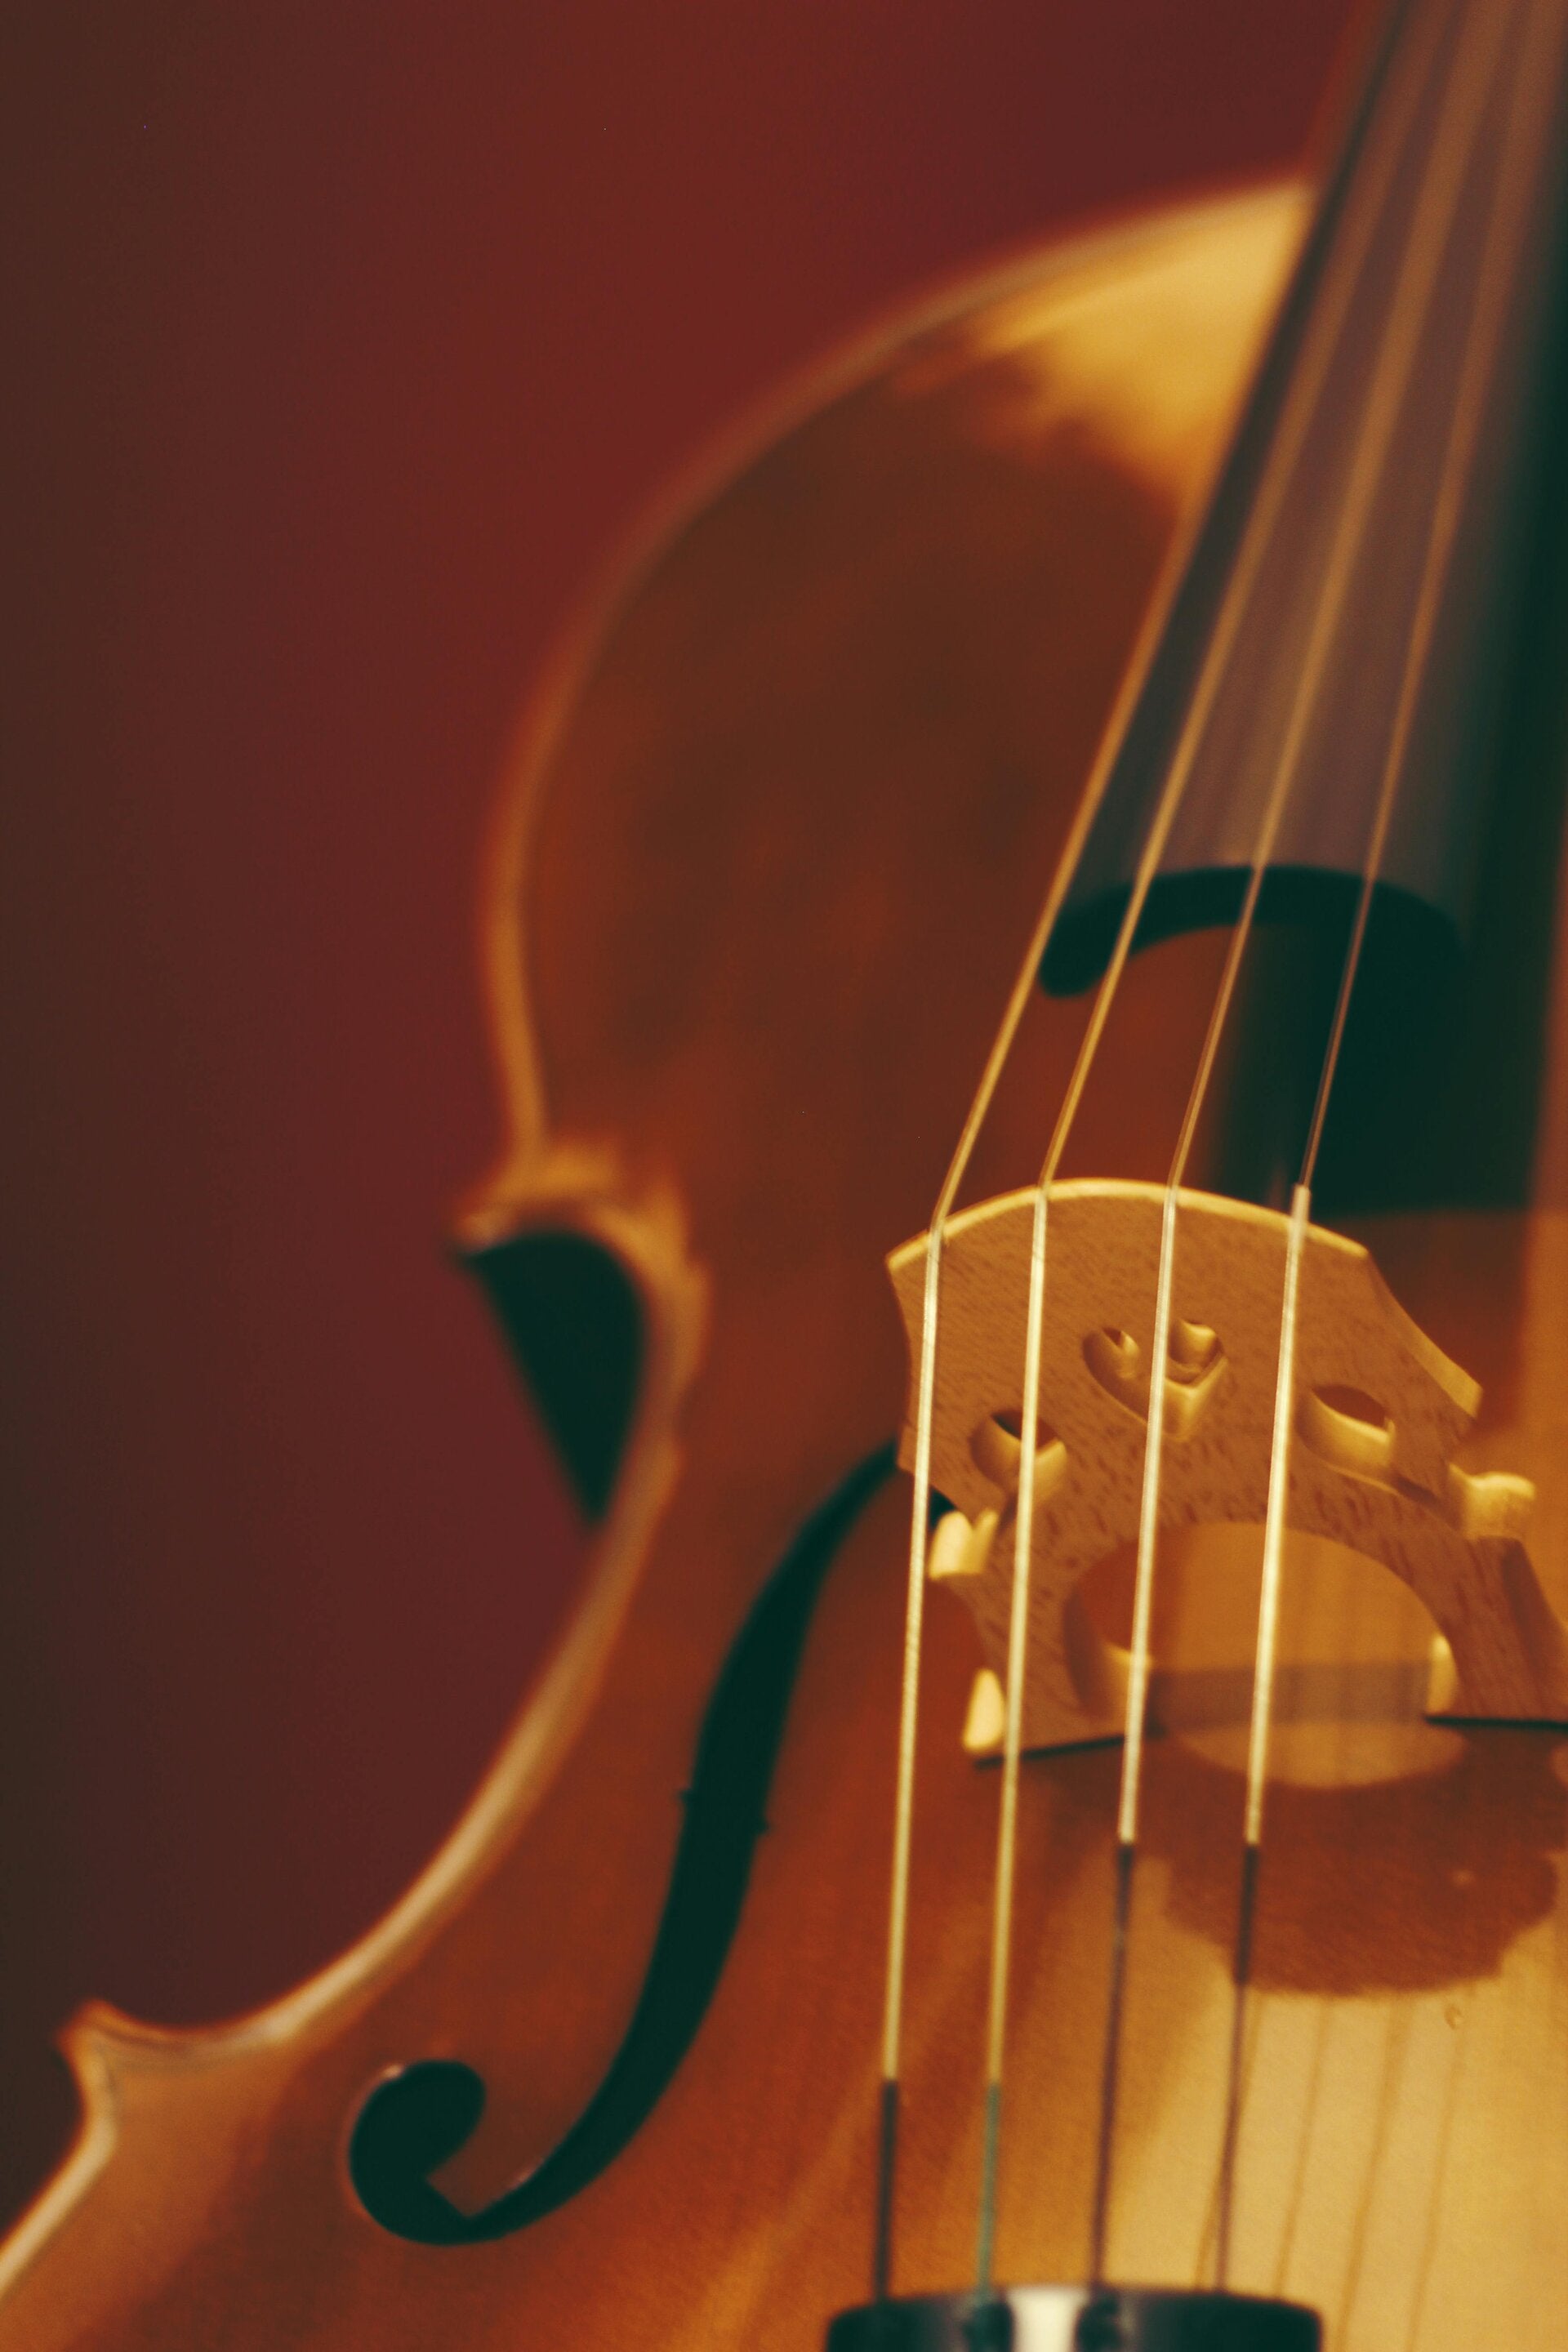
The cello is a large string instrument that you play while sitting down, and it makes a deep, warm, and beautiful sound. It has four strings called C, G, D, and A, going from the lowest to the highest. Before you start playing, you need to put rosin on your bow because it helps the bow grip the strings and create sound. To do this, gently rub the rosin up and down the bow hair several times. Then sit up straight in your chair with both feet flat on the floor. Place the cello between your knees so it feels balanced and does not wobble, and make sure the endpin is resting on the floor to hold it up. The top of the cello should be near your chest. Next, hold the bow in your right hand with relaxed, curved fingers and a bent thumb, keeping your hand soft and not stiff. Your left hand rests on the neck of the cello and will be used later to press the strings. To make your first sound, place the bow on one string and gently pull it across, then push it back the other way—this is called bowing. Try to keep the bow straight and stay in the middle between the fingerboard and the bridge so the sound is clear and smooth. Start by playing the open strings without pressing down with your left hand, and listen carefully to how each string sounds. Practice moving the bow slowly and evenly, and try not to rush. You can also practice stopping the bow and starting again to stay in control. As you get more comfortable, you will begin to use your left-hand fingers to press the strings and make different notes. Learning the cello takes time, patience, and practice, but each time you play, you will get better and be able to make more beautiful music.

Learning the flute is an exciting new adventure, and this lesson plan explains how the journey begins. First comes getting to know the flute itself — the headjoint, the body, and the footjoint. Each piece needs to be handled carefully, and putting them together the right way helps the instrument feel comfortable to hold. Once the flute is ready, the next step is learning how to make a sound. Blowing gently across the hole on the headjoint, almost like blowing across the top of a bottle, helps create that first clear note. It doesn’t always work right away, but hearing a steady tone makes the practice worth it. Good posture and breathing come next. Sitting or standing tall allows deep breaths that support a strong, smooth sound. After that, the first notes—B, A, and G—start to come to life.
Fingers need to land in the correct spots, and switching between notes takes patience and steady practice. Reading simple music on the staff is also part of the early lessons. Moving slowly and
paying attention to rhythms helps match what the eyes see with what the flute plays. Daily practice makes everything easier. A routine of about 10–15 minutes is enough to warm up with long tones, review familiar notes, and try a short song. As skills grow, playing with other students in band becomes possible, and making music as a group is both challenging and fun. Setting small goals—like learning a new note or playing a song smoothly from start to
finish—helps build confidence along the way. Reaching each goal feels rewarding and makes the flute journey something to look forward to every day.
In this lesson I am making a video for a student who is much older than I am and struggles to have consistent lessons every week and wanted something she could work on when she did have the time. She wanted to understand key signatures and scales and chords, so I started her right from the beginning and explaining the scales and how the circle of fifths move. I show her the finger patterns to the scale and show the corresponding chords to that scale and key signature. I play things rather slow so the student can watch and see it clearly but also for when they try to play along with the exercise, it's not at a tempo that would be unrealistic for said student. Always move at the students speed so they don't feel like they have to play it fast like the teacher. When teaching virtual lessons especially, I make sure to have a phone holder that can allow the teacher to show the keys in all different manners and be able to show both hands playing simultaneously, and not just a shaky videos that can only show one hand at a time. Knowing how to teacher virtually too is very important, we never know when the next mass disease will be spreading again.
Create Your Own Website With Webador